




The Benefits of a Whitewash Wicker Finish vs. Traditional Paint

To whitewash wicker on a budget, thoroughly clean the woven fibers with mild soapy water, let them dry, and lightly sand the surface. Next, mix white latex paint with equal parts water, brush the diluted mixture deep into the crevices, and gently wipe away excess paint from the high points with a damp rag before finishing with a clear, non-yellowing topcoat.
Whitewashing offers a delicate balance when updating natural woven pieces, highlighting the beauty of the weave rather than burying it under a thick, plastic-like film. Traditional paint forms an opaque layer over woven reeds, which frequently clogs fine details and can crack over time as the furniture flexes with use. Stains penetrate deeply to alter the wood tone, but dark stains can make a space feel visually heavy. In contrast, whitewashing uses diluted pigment to deposit color into the recesses of the weave while leaving high points semi-sheer. This allows natural wood grain, subtle color variations, and handcrafted contours to shine through.
Whitewashing is also exceptionally cost-effective. Because the formula relies on heavy dilution with water, a single quart of paint covers multiple pieces of furniture. It provides a breezy, beachside feel that instantly brightens sunrooms, living areas, and covered porches. For more inspiration on techniques, check out this step-by-step tutorial on refreshing woven pieces.
| Finish Type | Opacity & Grain Visibility | Flexibility & Crack Resistance | Material Cost | Best Aesthetic Style |
|---|---|---|---|---|
| Whitewash | Semi-transparent; weave texture remains visible | High; flexes naturally with the woven fibers | Very Low; uses diluted paint | Coastal, Cottage, Farmhouse, Boho |
| Solid Latex Paint | 100% Opaque; covers grain and fills shallow crevices | Low to Moderate; prone to cracking on flexible seats | Moderate; requires full coats and primer | Modern, Graphic, Uniform Solid Colors |
| Wood Stain | Translucent to Semi-Solid; alters color tone directly | High; absorbs directly into raw wood fibers | Moderate; requires specific conditioners and topcoats | Traditional, Rustic, Warm Earth Tones |
Understanding Whitewash vs Stain
While both whitewash and wood stain alter the appearance of natural wicker, they interact with the woven fibers in fundamentally different ways:
- Whitewash: Relies on suspended white pigments in a water or lime base. The wash rests primarily on the surface and in tiny structural crevices, giving a soft, weathered patina without penetrating deeply into the core wood fibers.
- Pickling or Wood Stain: Formulated with dyes or pigments dissolved in chemical binders that penetrate the cellular structure of raw reeds. Stains permanently alter the undertone of the wood itself.
Whitewashing is more forgiving for DIY decorators. If an area looks too heavy, you can simply wipe it down with a damp rag before it dries to adjust the opacity.
Indoor vs Outdoor Performance
Wicker fibers react to humidity, temperature swings, and direct sunlight. Indoor pieces benefit from whitewashing because the water-based wash allows the natural material to breathe without trapping moisture inside the strands. If you prefer factory-finished indoor elegance without the DIY mess, explore our curated indoor whitewash wicker collection.
For outdoor wicker, extra protection is necessary. Raw lime-based washes can break down when exposed to heavy rain, and untreated paints can invite mildew. Outdoor furniture must be finished with an exterior-grade, water-resistant topcoat containing UV inhibitors to prevent the wash from chalking, yellowing, or peeling over time.
Preparation and Budget-Friendly Supplies
Proper preparation determines whether your refinishing project looks professional or messy. Wicker contains hundreds of tiny overlapping joints, so clearing out dirt and securing your workspace is critical.
Essential Materials to Whitewash Wicker on a Budget
You likely have many of these basic household supplies on hand:
- White Paint: Flat, eggshell, or satin water-based latex paint, or chalk-style paint.
- Clean Water & Mixing Bucket: For diluting the paint to your preferred transparency.
- Brushes: A 2-inch synthetic bristle brush for broad areas and a soft foam brush for delicate weaves.
- Lint-Free Cloths: Clean cotton rags, microfiber towels, or shop paper towels for wiping excess paint.
- Abrasives: 220-grit fine sandpaper and a soft wire brush.
- Cleaner: Mild liquid dish soap, warm water, and a sponge.
- Protective Gear & Drop Cloths: Safety glasses, a dust mask, work gloves, and a drop cloth to protect your floor.
Cleaning and Sanding Woven Fibers
Before applying your wash, follow these steps to clean and prep the surface:
- Vacuum Loose Debris: Use a brush attachment on your vacuum to pull out dust, pet hair, and loose particles trapped between the weaves.
- Wash the Surface: Scrub gently using warm water mixed with a few drops of mild dish soap and a soft-bristle brush. Avoid soaking natural wicker, as excessive water can weaken the woven joints.
- Dry Thoroughly: Let the piece dry completely in a well-ventilated area for 12 to 24 hours.
- Light Sanding: Lightly buff the surface with 220-grit sandpaper to remove flaking clear coats, smooth rough reeds, and create a mechanical key for paint adhesion.
- Remove Sanding Dust: Wipe down every contour with a slightly damp microfiber towel or tack cloth. For additional baseline prep advice, consult these traditional whitewashing techniques.
Step-by-Step Application and Sealing Process
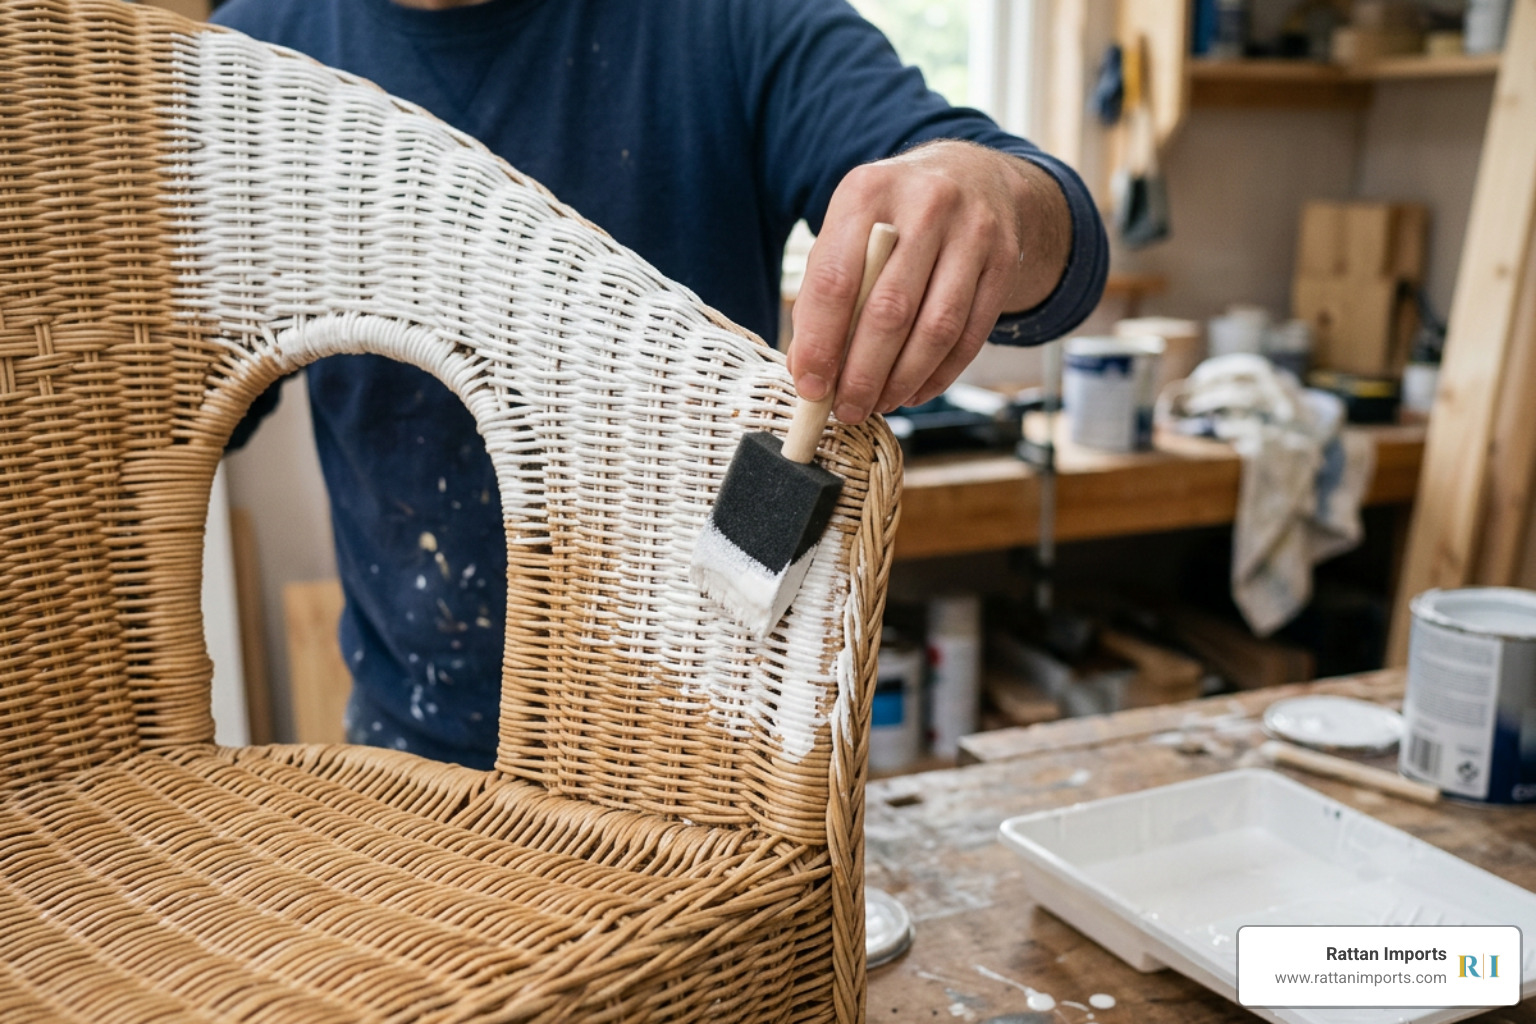
Whitewashing requires a rhythmic technique: apply the wash, let it settle briefly, and wipe back the excess to reveal the woven texture beneath.

How to Whitewash Wicker That Has Existing Paint or Stain
If your wicker already has an old finish:
- Previously Painted Wicker: Lightly sand the entire piece to remove the gloss. If the existing paint is dark and chipping, scrape loose flakes away. You do not need to strip it to bare wood, but the surface must be matte so the wash can cling to the paint.
- Previously Stained Wicker: Dark oil stains can bleed through water-based washes. To stop tannin bleed, apply a thin coat of clear shellac or water-based stain-blocking primer before applying your whitewash.
Mixing, Brushing, and Wiping Techniques
- Mix the Whitewash: Combine equal parts white latex paint and clean water (1:1 ratio) in your bucket and stir until smooth. If using chalk paint, start with 2 parts water to 1 part paint (2:1 ratio) for a fluid wash.
- Work in Small Sections: Focus on one arm, leg, or woven panel at a time to prevent the diluted mixture from drying before you can blend it.
- Brush Into Crevices: Dip your brush and push the wash into the crevices of the weave, ensuring the bristles reach behind overlapping strands.
- Wipe Back Excess: After 1 to 2 minutes, use a damp lint-free cloth to gently wipe over the surface, removing excess paint from the high points while leaving the pigment settled deep in the weave.
- Evaluate Color Depth: Let the initial coat dry for 30 minutes. If you want a more opaque, creamy farmhouse appearance, apply a second thin layer following the same process.
If you love this coastal, artisanal look, our Bar Harbor whitewash rattan armchair and matching whitewash coffee table provide handcrafted comfort built on durable, kiln-dried natural framing.
Drying Times and Protective Topcoats
Allow your whitewashed furniture to dry for at least 4 to 6 hours in a low-humidity room before handling it.
To protect your finish, apply a clear protective sealer:
- Select a water-based, non-yellowing polycrylic or polyurethane in a matte or satin sheen.
- Avoid oil-based varnishes, which develop an amber tint over time that ruins bright white tones.
- Use a lightweight aerosol spray sealer to coat the complex weave evenly without runs or drips. Apply 2 to 3 light coats, waiting 1 hour between applications.
For completely finished, high-end patio or sunroom configurations, pieces like the Spice Islands sunroom seating set are factory-sealed to withstand daily indoor relaxation with minimal maintenance.
Long-Term Maintenance and Common Mistakes to Avoid
Caring for whitewashed wicker is simple when you establish a regular cleaning routine:
- Regular Dusting: Use a soft microfiber duster, feather duster, or vacuum brush attachment weekly to prevent dust from accumulating in the weave.
- Spot Cleaning: Wipe spills immediately with a soft cloth dampened with warm water and mild soap. Never saturate the fibers.
- Avoid Harsh Chemicals: Do not use bleach, ammonia, abrasive scrub pads, or solvent-based cleaners, as they strip away clear topcoats.
- Sun & Moisture Management: Keep natural wicker pieces out of continuous driving rain or intense, direct mid-afternoon sun.

Common DIY Whitewashing Mistakes
- Applying Paint Too Thickly: Using undiluted paint clogs the weave and creates an uneven, gummy finish that cracks easily.
- Skipping the Wipe-Down: Leaving the wash to dry without wiping removes the semi-sheer effect, resulting in a streaky, half-painted look.
- Over-Saturating Natural Wicker: Soaking woven rattan or willow with too much water can warp reeds and loosen joints.
- Forgetting the Topcoat: Leaving the whitewash unsealed exposes the water-diluted pigment to moisture, causing it to rub off during routine cleaning.
If you want a coordinated setup without the DIY work, our Bermuda six-piece seating group offers resort-style seating with a durable, weather-resistant whitewash finish.
Frequently Asked Questions about Whitewashing Wicker
Can I use bleach instead of paint to lighten dark wicker?
Household bleach can lighten natural fibers, but it poses risks. Undiluted bleach degrades natural reeds, making them brittle and prone to snapping. A diluted water-based paint wash is safer, more predictable, and protects the structural integrity of the furniture.
What is the ideal paint-to-water ratio for a whitewash mixture?
For standard latex paint, a 1:1 ratio of paint to water provides smooth workability and easy wipe-back. For chalk-style paints, use 2 parts water to 1 part paint (2:1). Always test your mixture on an inconspicuous spot, like the underside of a chair seat, to confirm opacity before painting the entire piece.
How do I clean whitewashed wicker without damaging the finish?
Clean your furniture with a microfiber cloth dipped in warm water mixed with a few drops of gentle liquid dish soap. Wring the cloth out thoroughly so it is damp rather than soaking wet. Gently wipe the surface, then dry it immediately with a clean towel.
Conclusion
Whitewashing is one of the most rewarding and budget-friendly ways to transform worn, dated woven furniture into bright, coastal-inspired statement pieces. By cleaning the weave, mixing a simple paint-and-water wash, and sealing the surface with a durable topcoat, you can give your furniture years of renewed beauty.
At Rattan Imports, we believe that creating a welcoming home should be simple and accessible. Whether you tackle your own DIY restoration or explore our curated selection of sustainably sourced furniture assembled in the U.S., we are here to help you bring natural, timeless texture into your living space. We offer free shipping across the mainland U.S. and stand firmly behind our pieces with our comprehensive price match guarantee.